Packing and transporting live insects shipping boxes are very crucial, which is why important considerations should be made to pack and shipped fragile items like insects.
This blog is intended to assist you in the best of our ways on how to transport live insects shipping boxes nationally or internationally.
Significant Points to be Consider for Packaging and Shipping of Live Insects Shipping Boxes
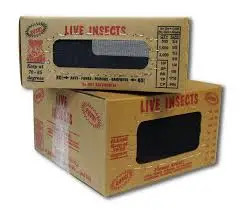
Choice of a Sturdy Box
Make sure the specimen box has a solid pinning bottom and is strong. Choose a box that is the right size for the number of insects; for example, don’t choose a big box for just a few specimens or cram too many insects into a small box. Naturally, thicker foams will hold even more firmly, but they frequently “push” the labels on the pinned specimens towards one another, making it more difficult to reset them. As long as they are at least 14″ thick, the modern polyethylene foams used in pinning trays appear to be sturdy enough to hold pinned specimens during shipping. The box should have a cover that fits snugly and can be fastened.
DO NOT OVERPACK!
Be careful not to overpack the live insects’ shipping boxes tightly (body parts, notably antennae and tarsi, should never overlap), as this could cause injury to them or other specimens after removal. The insects should ideally fill the box, but if they don’t, fill the remaining space with blank pins to prevent having huge, pin-free sections of foam bottom.
For large or heavy insects, use brace pins. One of the most frequent errors we have observed is this one! To prevent them from spinning on their pins and harming other insects, several of the bigger species in the example above are ringed by bracing pins. To fully immobilize exceptionally long or heavy insects, extra pins should be braced on each side of the thorax. At least two pins should be used; we suggest you position them against the elytra on each side behind the hind legs. Insects with exceptionally heavy heads (big mandibles, etc.), which are not illustrated in this example, should be even further immobilized with additional pins at the head.
Padded Inner Layer
Use a padded inner lid to keep it securely in place against the specimens. To keep the insects safely seated in the foam and prevent them from “working their way out,” an inner lid is placed on top of live insects’ shipping boxes. Some shipping-friendly insect boxes, like the ones in these pictures, include an interior cover that is hinged on a long side. If the specimen box is missing an inner lid, make one out of cardboard or sturdy card stock.
If an inner lid must be fashioned, it must be properly cut to fit within the box to reduce the possibility of movement. The benefit of an attached inner lid is that it will not move inside the box. We like to trace the insect’s box onto the cardboard, cut along the lines, and then shape the cardboard to fit the inside of the box by shaving additional material from each side. In either case, create a “pull tab” out of sticky tape and affix it to the inside lid to make unpacking easier.
Extra padding material, such as paper towels, should be placed on top of the inner lid to ensure that it seats firmly against the specimens when the outer lid is set in place if the inner lid when set in place, does not seat firmly against the outer lid.
Tighten the Lid with Tape
Use tape or rubber bands to secure the lid of the specimen box. The insect box’s exterior lid should be fastened tightly to prevent it from “working” loose. Some use tape, which works well but needs to be cut if the box is opened for inspection, leaving the lid exposed. We recommend using strong rubber bands that can be easily replaced after being removed for inspection. A metal tab or hoop that slides into a slot on the outer lid of some specimen boxes and may be bent to lock it in place is available. Rubber bands or tape are a useful protection policy for such boxes because these frequently break off after prolonged use.
Make Sure the Use of Zip-lock Bags
Putting insect boxes inside plastic Zip-Lock bags or wrapping them in packing paper is another typical approach. This was important in the past when the insect’s box was frequently packed with excelsior shavings, which had shavings that may get inside the insect’s box and cause harm. There should no longer be any need to use excelsior shavings with readily available modern packing materials like foam peanuts. Even yet, if desired, wrapping or sealing inside a plastic bag won’t do any harm.
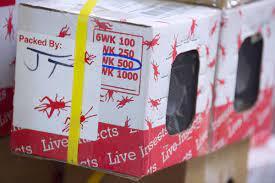
Put the Address Label on Box
Give the sample box an address label. If the outside address label is lost or damaged, this will ensure that the package does not end up in the “dead mail” pile. Multiple insect boxes should be carefully secured together. When transporting many live insects shipping boxes together, they must be held securely together to prevent “bumping” during transport. We have already explained that tape works, but it might get cut for inspection, therefore we like to use big rubber bands instead. The boxes can be tied together with string as well, but unless the inspection agent knows how to tie knots, the boxes might not get knotted back together.
Let’s Summarize:
Thus, the sample package should be placed inside a large shipping box. The choice of shipping box size is crucial! The live insect shipping boxes need to be strong in addition to being large enough to fit insect boxes at least three to four inches below, two to three inches above, and one to two inches on each side.
This area is required so that the packing material can serve as “shock absorption” as well as padding. Foam peanuts are my preferred type of packing material because they don’t settle during shipping and can be utilized in exactly the right quantity for each box. Also read about complete design and packaging